
How to Backhand a Ground Ball: Technique Tips for Infielders
To backhand a ground ball, square your body to the ball, keep your glove hand turned so the palm faces the ball, and field it on the back of your glove hand with your wrist slightly bent. Stay low, watch the ball all the way into your glove, and your throwing hand follows right behind. That’s the core move, and it works whether you play infield or pitch.
So why does this matter? When a ball is hit just out of your forehand reach, the backhand is your only option — and fumbling it can cost your team a run or an out. We researched what coaches at every level teach, and we found that most backhand mistakes come from two things: bad footwork and dropping the glove too low. Want to avoid both? Keep reading.
- Footwork first: get your body aligned before the ball arrives.
- Glove position: palm out, fingers toward the ground, wrist firm but not stiff.
- Stay low: bend your knees, not your waist.
- Eyes on the ball: watch it into the glove every single time.
- Quick transfer: get the ball out fast to make the throw.
Below, we walk through the exact steps, common mistakes to avoid, and a few drills to make the backhand feel natural. Let’s get into it.
Fielding the Backhand Play Step by Step
Ready for the full breakdown? The backhand comes down to four moves: read the ball, cross over, field it clean, and throw fast. Miss one, and the whole play falls apart. Let’s walk through each one.
Step 1: Read the Ball and React Early
The moment the ball leaves the bat, you have a decision to make. Can you get your body in front of it? If not, it’s backhand time. Many coaches say the quickest read wins here, because hesitation costs you a step you can’t get back.
Don’t panic when you make that call. The backhand isn’t a desperation move. It’s a skill, and like any skill, it gets smoother with reps.
Step 2: Get Your Feet Right
Footwork is where most backhands live or die. You want a crossover step with your back foot, pushing toward the ball. This turns your hips and gets your glove side pointed where it needs to be.
Think of it like opening a door. Your feet are the hinge, and your body swings through. If your feet are tangled, you’re trying to open that door from the wrong side.
Here’s what good footwork looks like:
- Push off your back foot toward the ball.
- Cross over so your glove side leads.
- Take short, quick steps — not long lunging strides.
- Plant your back foot so you’re in a throwing position already.
That last point is a big one. We found that the best infielders set up their throw while fielding, not after. Your plant foot should land so your hips face your target.
Step 3: Present the Glove Correctly
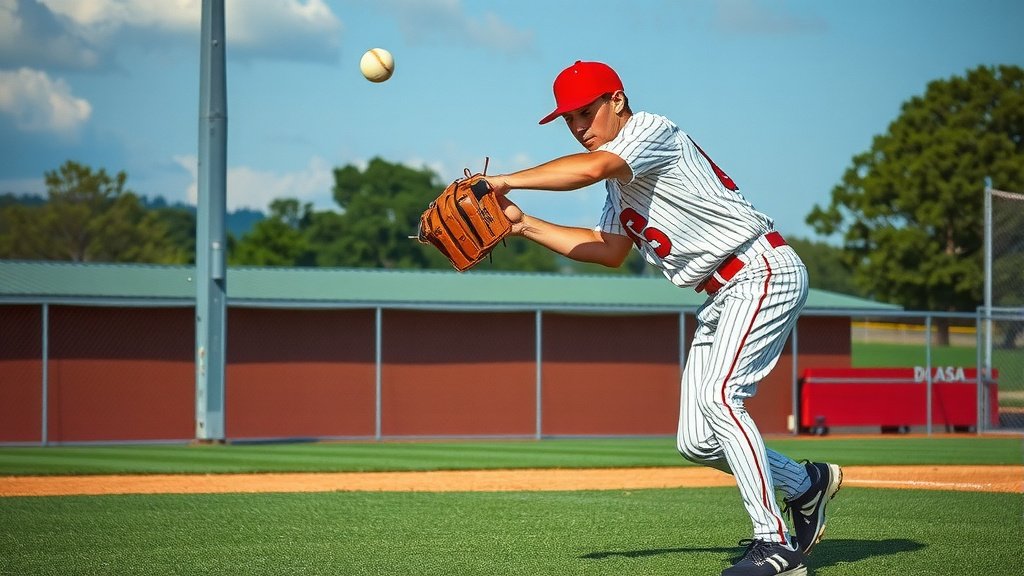
Now for the hands. Turn your glove so the palm faces the ball and your fingers point down toward the ground. Your wrist bends slightly back, almost like you’re about to catch a flying coin behind you.
Keep the glove out in front of your body. Don’t let it drift back toward your side. A glove that’s too close gives the ball less room to travel before it hits you.
Where to Catch the Ball
Catch the ball on the back of your glove hand, in the pocket near the heel. This feels odd at first — your brain wants to use the big open part of the glove. Trust the pocket. It controls the ball better on this play.
Wrist and Elbow Position
Your wrist should be firm but relaxed. Too stiff, and the ball pops out. Too loose, and the glove flops over. Many experts compare it to a handshake — confident, not crushing.
Your elbow stays slightly bent and away from your body. This gives you room to snap the glove and absorb the ball’s force.
Step 4: Stay Low and Watch It In
Bend your knees, not your waist. Bending at the waist makes you off-balance, and it pulls your eyes away from the ball. Sports medicine sources, including the Cleveland Clinic, note that poor body mechanics like waist-bending also raise your risk of lower back strains. Your knees are built for this. Your spine is not.
And your eyes? Lock them on the ball. Watch it all the way into the pocket. It sounds obvious, but you’d be surprised how many players peek up to check the runner before the ball is secure. Slow down. Catch first, throw second.
Turning the Backhand Catch Into a Fast Throw
Catching it is half the job. The other half is getting rid of the ball quickly. Here’s the good news: if your footwork was right, you’re already lined up to throw.
As the ball hits your glove, your throwing hand moves in right behind it. Pull the ball out with your fingers on top of the seams, and let your momentum carry you into the throw. No extra steps, no re-setting your feet.
Some plays give you a little more time. On those, you can take a small shuffle or step toward your target. But on the tight ones? Throw from the same stance you fielded in. We found that practicing the one-motion transfer shaves real time off these plays.
Common Backhand Mistakes (and How to Fix Them)
Even experienced players slip into bad habits on the backhand side. Here’s what we see most often, and the simple fix for each.
| Mistake | Why It Hurts | Quick Fix |
|---|---|---|
| Dropping the glove low | Ball skips under or pops out | Keep fingers pointed down, glove out front |
| Bending at the waist | Off-balance, eyes leave the ball | Bend the knees and stay tall in the chest |
| Backpedaling to the ball | Loses ground and balance fast | Use a crossover step instead |
| Peeking at the runner early | Ball hits off the glove | Watch it into the pocket, every time |
| Slow transfer to throwing hand | Runner beats the throw | Practice pulling the ball out in one motion |
The “One-Handed Grab” Trap
Some players try to snag the backhand with just the glove, then flip it over. It looks cool on highlight reels. In real games, it’s a coin flip. Use your throwing hand as a backup and a quick transfer — not a luxury you skip.
Drills to Sharpen Your Backhand
You don’t need fancy equipment. A bucket of balls, a wall, and a partner will do. Here are a few drills coaches commonly recommend:
- Wall skips: Roll a ball off a wall at an angle and field it on the backhand side. Teaches glove angle.
- Short-hop tosses: Have a partner toss balls that bounce just in front of you. This is the hardest read in baseball, so get comfortable with it.
- Cone footwork: Place a cone where the ball would be hit. Practice the crossover step to it without a ball, then with one.
- Rapid-fire transfers: Field, transfer, and simulate a throw in one motion. Ten reps in a row, no fumbles.
- Slow rollers to the right: Nothing tests your footwork like a dying quail you have to charge and backhand.
Do these two or three times a week and the movement starts to feel automatic. Your body learns the pattern, and your brain stops overthinking it.
Your Pre-Game Backhand Checklist
Before you take the field, run through this quick list. It takes about a minute, and it keeps the fundamentals fresh.
- Glove angled palm-out, fingers toward the ground.
- Knees bent, waist tall, weight on the balls of your feet.
- Crossover step rehearsed and ready.
- Eyes committed to tracking the ball the whole way.
- Throwing hand primed to follow the glove in.
- Plant foot habit drilled so you land ready to throw.
Tape it to your dugout wall if you have to. There’s no shame in a reminder — even the pros review the basics.
Special Situations: Pitchers and Hard-Hit Balls
If you pitch, the backhand matters even more. A liner back at you or a chopper off the mound often forces exactly this play. Your follow-through position actually helps here — your glove is already moving toward your glove side after the pitch, so you’re halfway there.
For scorched balls, remember the golden rule: get something in front of it. If a clean backhand catch isn’t possible, block the ball with your body, recover it, and make the play. A stop that saves two runs beats a whiff at a highlight-reel grab every time.
And on slow rollers? Charge the ball hard. Time is your enemy, and every step you give the runner makes your throw longer and harder.
Conclusion
The backhand doesn’t have to be the play you dread. Once your footwork, glove angle, and transfer click into place, it becomes just another ball you field with confidence. Remember the big three: crossover step to line up your body, glove out front with fingers down, and eyes locked on the ball until it’s secure. We found that players who drill this two or three times a week stop thinking about it entirely — their bodies just take over. So here’s your next step: grab a bucket of balls this week and run the wall-skip and rapid-fire drills. Ten clean reps in a row is your goal. Get those, and you’ll be ready the next time a ball lands just out of reach.
Frequently Asked Questions
Should I backhand with one hand or two?
Use two hands whenever you can. Your throwing hand acts as a safety net and gets you into position for a faster transfer. One-handed grabs only make sense when you’re fully extended and there’s no other option.
Is backhanding harder at second base or shortstop?
Shortstop sees more backhands because right-handed hitters pull the ball that way more often. Second basemen deal with them too, but usually with less time on slow rollers. Either way, the technique stays the same — only the reads change.
How do I handle a bad hop on a backhand play?
Expect the hop to be uncertain and play through the ball instead of at it. Keep your glove slightly wider in the zone where the bounce might land, and stay low so a bad skip stays in front of you. Blocking it and recovering beats a whiff every time.
What size glove is best for backhand plays?
A glove in the 11.25 to 11.75 inch range works well for most infielders. Smaller gloves let you transfer the ball faster, while slightly larger ones give you more reach on the backhand side. Prioritize a pocket you trust over raw size. Our baseball glove cost guide breaks down what different sizes and materials typically run.
How long does it take to get comfortable fielding backhands?
Most players notice real improvement after a few weeks of consistent reps — think two or three short sessions a week. The crossover footwork usually feels natural first, then the glove angle, then the quick transfer. Be patient with yourself; everyone’s timeline is a little different.