How to Throw Without Hurting Your Arm: A Safe Guide
Throwing without hurting your arm comes down to one thing: using your whole body, not just your arm. When you push off your legs, rotate your hips and torso, and let your arm follow along, the force spreads out instead of slamming into your elbow and shoulder. If your arm does all the work, it will eventually let you know — and not politely.
Many experts say that most throwing pain comes from poor mechanics, throwing too much without rest, and skipping warm-ups. We found that simple fixes — like better warm-ups, stronger legs and core, and actually listening when your arm aches — can make a huge difference. No, you don’t need a fancy training program or a pro coach to protect your arm.
TL;DR:
- Throw with your legs and hips, not just your arm.
- Always warm up before you throw hard.
- Build arm and core strength with simple exercises.
- Stop throwing when your arm hurts — pain is a warning, not a badge of honor.
- Rest matters as much as practice.
Below, we break down everything you need to know about throwing safely, step by step. Your arm will thank you.
Throwing Safely: Protecting Your Arm Every Time You Throw
The safest throw is one where your legs do the heavy lifting. Think of your body like a whip — the power starts at your feet and travels up, so your arm just finishes the job. If your arm has to start the power itself, that’s when elbows and shoulders start complaining.
We found that most throwing injuries trace back to three things: bad mechanics, too much throwing, and zero warm-up. The good news? All three are fixable with a little attention.
Get Your Whole Body Involved in the Throw
Good throwing is a chain reaction. Feet, hips, torso, arm — in that order. Here’s how it flows:
- Start on your back foot and push off the ground.
- Rotate your hips toward your target first.
- Let your torso follow — this is where most of your power lives.
- Your arm should feel like it’s along for the ride, not driving the car.
If your throw feels all arm, slow down and feel your legs working. Many coaches use the phrase “throw with your feet.” It sounds odd until you feel the difference.
Fix the Most Common Mechanics Mistakes
Some habits quietly wreck arms. Watch for these:
- Opening up too early — your front shoulder flies open before your hips arrive.
- Short-arming — cutting your arm swing short and muscling the ball.
- Throwing flat-footed — no push, no power, all arm.
- Dropping your back side — falling off the mound instead of finishing tall.
Record yourself on your phone. Seriously. Most people are shocked when they finally see what they’re actually doing.
Feel the Difference With This Simple Drill
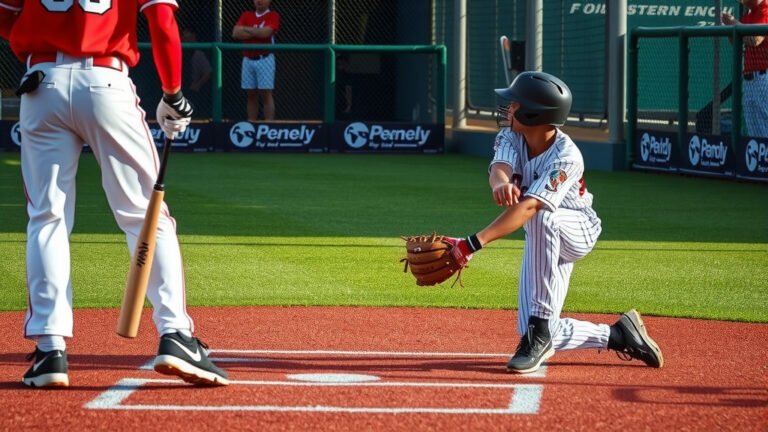
Try kneeling throws. Kneel on your back knee, front leg bent, and toss gently. With your legs out of the picture, you learn how your torso rotation should feel. Then stand up and recreate that same rotation. We found this drill helps people connect hips to arm faster than almost anything else.
Warm Up Like You Mean It
A warm arm is a happy arm. Cold muscles and tendons are stiff, and stiff tissue tears. Cleveland Clinic guidance on injury prevention stresses warming up before any repetitive overhead activity, and throwing is about as overhead as it gets.
Your warm-up doesn’t need to be fancy. It needs to be consistent.
A 5-Minute Pre-Throw Warm-Up
- Two minutes of light cardio — jog, jump rope, or brisk walk.
- Arm circles, small to large, both directions.
- Band pulls for your shoulders and upper back.
- Easy tosses from a short distance, building up gradually.
- Only then, start throwing at full effort.
Skipping the warm-up to save five minutes? That’s like skipping the seatbelt to get somewhere faster. Not worth the math.
Cool Down After You Throw
What you do after throwing matters too. Light stretching, gentle arm movement, and ice if you’re sore can help recovery. Many trainers recommend a short cooldown routine as a standard part of any throwing session — treat it like brushing your teeth, not an optional extra.
Build the Strength That Protects Your Arm
Strong legs and a strong core take load off your arm. Research on throwing injuries, including studies indexed by the NIH, consistently points to conditioning as a protective factor for overhead athletes.
You don’t need a gym membership, either. Bodyweight work covers a lot of ground.
Simple Exercises That Actually Help
| Exercise | What It Protects | How Often |
|---|---|---|
| Squats or lunges | Leg drive for your throw | 2–3x per week |
| Planks and side planks | Core rotation power | 2–3x per week |
| Band rows | Shoulder blade muscles | 3x per week |
| Band external rotations | Rotator cuff | 3x per week |
| Light dumbbell raises | Overall shoulder stability | 2x per week |
Notice what’s missing? Heavy arm-focused lifting. Your arm needs endurance and stability, not boulder shoulders.
Don’t Forget Your Legs
Here’s a question worth asking: why do so many players train arms and skip legs? Your legs generate the majority of the force in a throw. Weak legs mean your arm covers the gap. Strong legs mean it doesn’t have to.
Know Your Throwing Limits (And Respect Them)
Volume is where arms break down. Even with perfect mechanics, throwing too much without rest overloads tissue faster than it can recover. Youth baseball guidelines from groups like USA Baseball and the American Sports Medicine Institute recommend pitch counts and mandatory rest days, and the same logic applies to anyone who throws often.
Soreness after throwing happens. Sharp pain, pain that lingers, or pain that gets worse? That’s your body filing a formal complaint. Listen the first time.
Warning Signs You Shouldn’t Ignore
- Pain on the inside of the elbow during or after throwing.
- Losing velocity or accuracy out of nowhere.
- A feeling of looseness or instability in the shoulder.
- Soreness that hasn’t improved after a few days of rest.
- Tingling or numbness in your hand or fingers.
If any of these show up, stop throwing and give it real rest. If pain sticks around more than a week or two, Mayo Clinic advice on shoulder and elbow pain points toward getting it checked by a doctor. Waiting rarely makes things better — it usually just makes the rehab longer.

Rest Is Part of Training, Not the Enemy of It
Here’s a truth nobody loves: you don’t get better while throwing. You get better while recovering from throwing. Tissue rebuilds during rest. Skip the rest, and you’re stacking fatigue on fatigue until something gives.
Take at least one full day off throwing each week. Sleep well, eat real food, and hydrate. Boring? Yes. Effective? Also yes.
Your Pre-Throw Safety Checklist
Pin this to your brain before every session:
- Warmed up with light cardio and arm circles? ✓
- Band work done? ✓
- Easy tosses before hard throws? ✓
- Feeling strong legs and core doing the work? ✓
- No pain — just effort? ✓
- A rest day planned this week? ✓
Six checkmarks means you’re ready. Anything missing means fix that first.
Make Safe Throwing a Habit, Not a One-Time Fix
The biggest change isn’t one drill or one stretch. It’s deciding that your arm is a long-term investment. We found that people who treat warm-ups, strength work, and rest as non-negotiable keep throwing pain-free for years. Everyone else learns the hard way — and nobody wants to be everyone else.
Start with one thing this week. Maybe it’s the warm-up. Maybe it’s the rest day. Small habits, stacked up, keep you on the field instead of on the bench.
Conclusion
Protecting your arm isn’t about one magic fix — it’s about stacking a few smart habits. Throw with your legs and hips, warm up every single time, build strength where it counts, and respect your throwing limits. When pain shows up, treat it as information, not something to push through. Rest isn’t laziness; it’s how your arm stays in the game. We found that people who make these habits automatic stay healthy season after season, while everyone else ends up icing their elbow and wondering what went wrong. So here’s your next step: pick one habit from this article — the warm-up is a great start — and commit to it every time you throw for the next month. Your future self will be glad you did.
Frequently Asked Questions
Why does my arm hurt after throwing, even when it feels fine during the throw?
Pain that shows up after the session usually points to overload — you did more work than your tissue could recover from. It can also signal a mechanics issue where your arm absorbs force it shouldn’t. Take a day or two off, and if it happens repeatedly, dial back your throwing volume and have someone check your form.
How long should I rest my arm between throwing sessions?
For casual throwers, at least one full day off between hard sessions works well. If you’re throwing at max effort or throwing a lot, give yourself two. Research we found on overhead athletes suggests that consistent rest days reduce overuse injuries far better than trying to tough it out.
Can you still throw with good velocity without using your arm as much?
Yes — and honestly, that’s the whole point. Your legs and core generate most of the power in a strong throw, and a well-timed arm just directs that force. Athletes who learn proper sequencing often gain velocity while their arm feels better, not worse.
Is it bad to throw through soreness?
General muscle soreness after a long layoff is normal and usually fine with lighter throwing. Sharp pain, worsening soreness, or pain in the elbow or shoulder joint is different — that’s a stop sign. The rule we recommend: sore muscles can work, sore joints don’t.
At what point should I see a doctor about throwing pain?
If pain lasts more than a week or two despite rest, gets worse over time, or comes with numbness, tingling, or a feeling of instability, get it checked. Seeing a doctor early usually means a shorter recovery. Waiting often turns a minor issue into a months-long project.