How to Long Toss Properly: Technique Tips for Throwers
To long toss properly, start with a short warm-up throw of about 20 to 30 feet, then gradually increase distance while keeping your throwing mechanics smooth and your feet moving. The key is to throw with an arc, not a flat line, and stop when your arm feels tight or tired.
Long toss isn’t about how far you can heave the ball. It’s about building arm strength and endurance safely over time. We researched what pitching coaches and trainers recommend, and we found that most agree on the same core rules: warm up first, use good form, and never push through pain. Sounds simple, right? But plenty of players skip the warm-up and wonder why their shoulder hurts the next day.
- Warm up with short throws before extending your distance.
- Keep your mechanics clean, even when throwing far.
- Use a slight arc at max distance instead of a flat throw.
- Stop when your arm feels sore, loose, or off-sync.
- Long toss works best as a steady routine, not a one-time max-out contest.
Let’s walk through exactly how to do it step by step, so your arm gets stronger without any unwanted trips to the ice pack.
Long Toss Done the Right Way
The right way to long toss comes down to a slow build: short throws first, then longer ones, with clean form the whole time. Most arm injuries happen when players skip that build-up and go straight to max distance. We found that experts from the Mayo Clinic and research on youth throwing injuries all point to the same thing — gradual progression protects your arm.
Think of it like stretching before a sprint. You wouldn’t roll out of bed and bolt down the street. Your throwing arm deserves the same respect.
Step 1: Warm Up Before You Widen Out
Start with easy throws at about 20 to 30 feet. Your goal here isn’t distance. It’s getting blood flowing and loosening your shoulder and elbow. Do this for five to ten minutes.
Many trainers suggest at least 15 to 20 warm-up throws before you start extending. It feels like a lot when you’re eager to air it out. Trust us — your arm will thank you tomorrow.
Signs You’re Ready to Move Back
You’re ready when three things are true:
- Your throws feel effortless, not forced.
- Your partner catches the ball at chest level without diving.
- There’s no tightness in your shoulder or elbow.
- Your accuracy is steady at your current distance.
If any of those are missing, stay put a few more throws. Patience is a skill too.
Step 2: Extend Your Distance Gradually
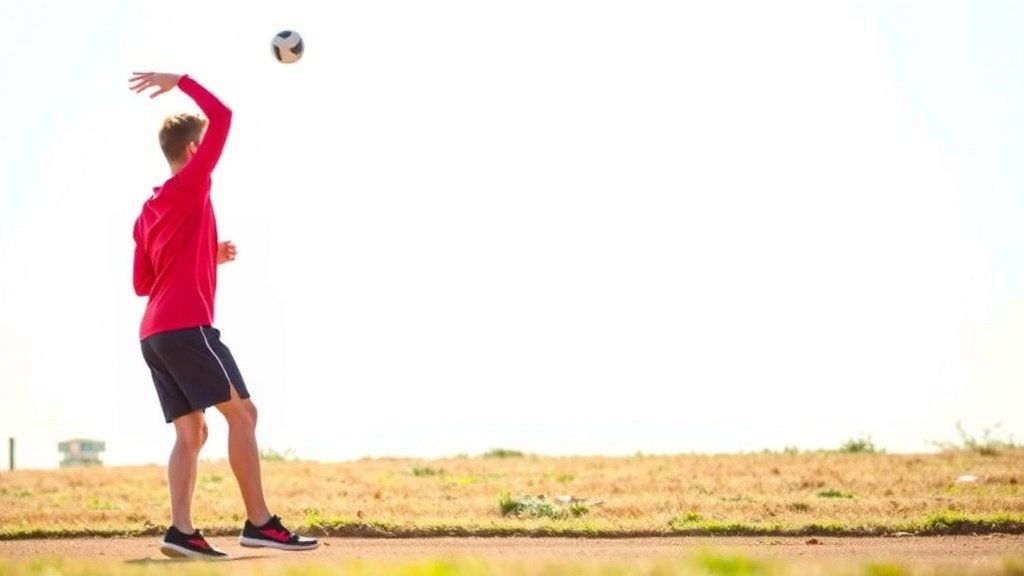
Move back in small chunks — roughly 10 to 15 feet at a time. As you go farther, let your throws carry a slight arc. A flat, laser throw at max distance puts serious stress on your elbow.
Research on throwing mechanics, including studies indexed by the NIH, shows that the arc lets the ball travel farther without you muscling it. Think of a nice rainbow, not a line drive to the moon.
Stop extending when your throws start bouncing before they reach your partner. That’s your natural max for the day. It changes with fatigue, weather, and how your arm feels — and that’s normal.
How Crow-Hopping and Footwork Help
At longer distances, use your legs. A light crow hop — a small skip toward your target — adds momentum from the ground up. This takes load off your arm and keeps your mechanics athletic.
Keep your feet moving through the throw. Stiff legs mean your arm does all the work, and that’s how arms get cranky.
Step 3: Pull Down and Finish Strong
After you hit your max distance, work your way back in. As you shorten up, throw the ball on a flatter line with more intent. This “pull-down” phase is where many coaches say you build real arm strength.
We found that most long toss programs, like ones discussed by baseball strength coaches, treat the pull-down as the meat of the workout. The long arcing throws loosen you up. The shorter, aggressive throws strengthen you.
How Often Should You Long Toss?
Two to three times per week works well for most players. Your arm needs recovery time between sessions — muscles get stronger during rest, not during the workout itself.
Many pitching coaches recommend pairing long toss days with your most intense throwing days, and taking at least one full rest day after. If you’re a youth player, follow pitch count and rest guidelines from groups like Little League and the CDC’s youth sports safety resources.
A Sample Weekly Long Toss Plan
Here’s a simple structure we found works for intermediate players:
| Day | Activity | Focus |
|---|---|---|
| Monday | Long toss, moderate distance | Smooth mechanics and arc |
| Tuesday | Rest or light band work | Recovery |
| Wednesday | Long toss with pull-downs | Arm strength |
| Thursday | Rest | Recovery |
| Friday | Bullpen or game throwing | Game-speed throws |
| Weekend | One light long toss day max | Keeping arm loose |
Adjust based on your schedule and how your arm feels. This is a guide, not a law.
Common Long Toss Mistakes to Avoid
Even enthusiastic players pick up bad habits. Watch out for these:
- Skipping the warm-up. Cold arms and long throws don’t mix.
- Throwing max distance every session. That’s a recipe for a dead arm.
- Trying to throw flat at max range. Use the arc; save the lasers for shorter distances.
- Ignoring pain. Soreness that lingers or sharp pain means stop (Cleveland Clinic advises never throwing through pain).
- Rushing the build-up. Your arm adapts over weeks, not days.
- Poor footwork. Lazy legs force your arm to overcompensate.
Sounds familiar? We’ve all been the player who wanted to win the distance contest on day one. The smart player wins in week six instead.
Your Pre-Session Long Toss Checklist
Run through this before every session. It takes 30 seconds and saves you weeks of recovery:
- Warm up with 15 to 20 short, easy throws.
- Do a few arm circles and band pulls before the first throw.
- Check that your partner is ready and the throw path is clear.
- Extend distance in 10 to 15 foot increments, not big jumps.
- Keep a slight arc once you’re past 100 feet or so.
- Stop the moment your arm feels tight, heavy, or off.
When to Stop Immediately
Your body sends signals. Listen to them:
- Sharp or pinpoint pain in the elbow or shoulder.
- Your arm feels heavy or dead on every throw.
- You can’t hit your target even at short distance.
- Your release point feels completely out of sync.
Any of these? Pack it up for the day. Ice if needed, and if pain sticks around more than a few days, see a doctor or athletic trainer. Throwing through it is how small tweaks become big injuries, according to guidance from the American Academy of Orthopaedic Surgeons.
Does Long Toss Actually Build Arm Strength?
Yes, with a catch. Long toss helps build endurance and arm speed when done consistently with good mechanics. We found that opinions vary among coaches about its value compared to mound pitching, but most agree it’s a useful tool — not a magic one.
Research published through the NCBI on throwing programs shows that structured, progressive throwing improves arm fitness over time. What it doesn’t do is turn a soft tosser into a flamethrower in a month. Strength also comes from your legs, core, and overall conditioning, so don’t hang everything on your arm.
Pair long toss with a solid strength routine, plenty of rest, and good nutrition. That’s the full recipe. The long toss is just one ingredient — a tasty one, but still just one.
Conclusion
Long toss rewards the patient. Warm up with short throws, move back in small steps, use your legs, and finish with pull-downs to build real arm strength. Keep a slight arc at distance, and never push through pain. Two or three sessions a week gives your arm the rest it needs to actually get stronger. We found that the players who follow this steady approach are the ones whose arms hold up all season — not just for one impressive throw in March. Your next step: run through the pre-session checklist before your very next catch, and commit to easing off the moment your arm tells you it’s had enough.
Frequently Asked Questions
How long does a long toss session take?
Most sessions run 20 to 30 minutes, including your warm-up. We found that quality matters more than total throwing time. If you’re out there for an hour, you’re probably throwing past the point where your arm benefits.
Should youth players do long toss?
Yes, but with tighter limits. Youth players should follow age-appropriate distance guidelines and pitch count rules from Little League and other governing bodies. Keep the sessions short, skip the max-distance days, and make rest days non-negotiable.
Can I long toss without a partner?
You can, but it’s harder. Some players throw against a wall or use a rebound net to simulate distance. If you go that route, dial back your intensity and watch your arm closely, since you lose the feedback of a catchable ball.
What distance should I aim for in long toss?
There’s no magic number. Your max distance depends on your age, arm strength, and how you feel that day. Let your throws tell you — when the ball starts bouncing short, that’s your ceiling for the session.
Should I ice my arm after long toss?
Only if it feels sore or inflamed. If your arm feels normal after a session, light stretching and rest are enough. If you do ice, keep it to 15 or 20 minutes, and see a trainer if soreness lingers past a couple of days.