
How to Lace a Baseball Glove: A Step-by-Step Guide
Lacing a baseball glove is a skill every player needs. You can do it yourself with some patience and the right steps. This guide will show you exactly how to lace your glove so it fits perfectly.
Getting your glove laced just right makes a big difference on the field. A well-laced glove means better control and a more secure feel. It’s like giving your glove a custom upgrade. This process improves your glove’s performance.
- Lacing tightens your glove’s pocket.
- It helps create a custom fit.
- You can replace worn-out laces.
- It’s a skill that saves money.
Let’s walk through exactly how to lace your baseball glove, step by step. You’ll be ready for game day in no time!
“`htmlGetting Your Baseball Glove Laced Just Right
So, your baseball glove feels a bit loose, or maybe the laces are looking pretty worn. You’ve come to the right place! We’ll guide you through lacing your baseball glove so it feels like a custom extension of your hand. It’s a straightforward process once you know the tricks.
A well-laced glove means a snugger pocket and better control when catching those pop flies and hard grounders. Think of it as tuning up your most important piece of equipment. We found that many players underestimate how much good lacing impacts their game.
What You’ll Need to Get Started
Before you start, gather your supplies. Having everything ready makes the process much smoother. You don’t want to be halfway through and realize you’re missing something important. A little preparation goes a long way here.
Essential Tools for Glove Lacing
You won’t need a whole workshop for this. Most of what you need is pretty simple. Having the right tools makes the job faster and cleaner.
- New Glove Laces: Make sure you get the right length and material. Leather is standard, but some synthetic options exist.
- Lacing Tool or Awl: This helps push the laces through the small holes. A thin screwdriver or even a sturdy paperclip can work in a pinch, but a proper tool is best.
- Pliers: You might need these to grip the lace, especially when pulling it tight.
- Scissors: For trimming any excess lace at the end.
- A Clean Workspace: Find a spot where you won’t lose tiny parts or get your glove dirty.
Choosing the Right Replacement Laces
Not all laces are created equal. The material and thickness can affect how your glove feels and performs. We found that quality leather laces tend to be the most durable and offer the best grip.
- Leather: This is the traditional choice. It’s strong, durable, and molds well to the glove.
- Synthetic: Some newer gloves use synthetic laces, which can be lighter and more water-resistant.
- Thickness: Most gloves use laces that are around 1/4 inch wide. Too thick and they won’t fit through the eyelets; too thin and they might break under pressure.
The Step-by-Step Process for Relacing Your Glove
Now, let’s get down to business. We’ll break this down into manageable steps so you can follow along easily. Don’t rush; take your time with each part. It’s a bit like solving a puzzle.
Step 1: Carefully Remove the Old Laces
The first step is to get the old stuff out. You can either cut the laces (if you’re replacing them anyway) or carefully untie and pull them out. We recommend taking pictures as you go. This can be a lifesaver if you get confused about the original pattern.
Gently pull each lace free from the eyelets. If a lace is stubborn, you can use your lacing tool to help coax it out. Be patient. You don’t want to damage the leather around the eyelets. Many guides suggest noting the pattern of the webbing as you remove laces.
Step 2: Preparing Your New Laces
Once the old laces are out, it’s time to prep the new ones. You’ll typically start with one long lace for the main part of the glove. Some gloves have separate laces for the finger stalls. If yours does, you’ll need to repeat this process for those sections.
Feed one end of your new lace through the starting eyelets. You’ll usually begin at the wrist strap area or the base of the pocket. We found that leaving a few inches of lace at the starting point helps for the final tightening step. This extra bit is key!
Step 3: Weaving the Lace Through the Eyelets
This is the core of the lacing process. You’ll be weaving the lace back and forth through the eyelets. The key is to create a consistent pattern. Most gloves use a simple over-under weave for the main pocket and finger stalls.
Start by threading the lace through the first two eyelets, leaving a tail. Then, go to the next set of eyelets. Bring the lace around the back of one side and thread it through the adjacent eyelet on the other side. Continue this pattern up the glove. We found that keeping the lace relatively flat helps it slide better and creates a cleaner look.
The Pocket Weave: Creating a Deeper Pocket
The way you lace the pocket significantly affects how your glove performs. A good pocket allows you to catch the ball securely. For a deeper pocket, you want to lace the bottom section tightly.
When you reach the bottom of the pocket area, thread the lace through the two bottommost eyelets from opposite sides. Pull it taut. Some players prefer to add an extra pass here to really cinch down the pocket. This is where you can really customize the feel.
Lacing the Finger Stalls: Security and Flexibility
The finger stalls need to be secure but still allow for movement. The lacing here usually connects the individual fingers to the main glove body.
Thread the lace between the fingers, going through the designated eyelets. You’ll often have a vertical lace connecting the tips of two fingers, and then horizontal laces that connect these finger sections to the rest of the glove. Again, a picture from Step 1 can be a great reference here.
Step 4: Tightening and Adjusting
Once the lace is woven through all the eyelets, it’s time to tighten it up. This is where you’ll really feel the difference. You want the glove to be snug but not so tight that it’s uncomfortable or restricts movement.
Pull the lace slowly and evenly. Use your pliers if needed to get a good grip. Work your way up the glove, ensuring each section is firm. You’re aiming for a consistent tension. If one area is too loose, the glove won’t feel secure. If it’s too tight, it could damage the leather.
As you tighten, flex the glove. This helps set the laces and makes sure you haven’t over-tightened any single spot. Imagine you’re giving your glove a firm handshake. This step is crucial for achieving that custom fit. Many experts suggest breaking in the glove further after relacing.
Step 5: Finishing and Securing the Lace
You’re almost there! You’ll have a lace tail left. You need to secure this so it doesn’t come undone during play. The most common method is to tie a strong knot.
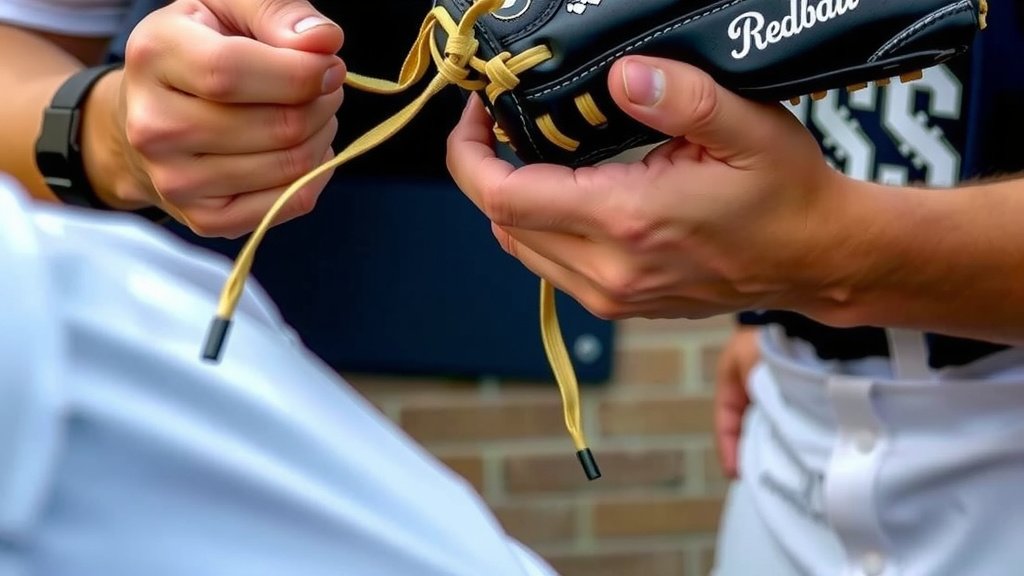
Tie a double knot or a surgeon’s knot to ensure it stays put. Trim any excess lace, but leave enough so you can untie it later if needed. You can tuck the knot into one of the eyelets or under the lace itself to keep it from snagging. A clean finish makes your glove look professional. We found that a small dab of leather conditioner on the knot can help keep it from fraying over time.
Quick Checklist for Relacing Your Glove
Here’s a quick rundown to make sure you don’t miss a step:
- Gather all your necessary tools and new laces.
- Take clear photos of the original lacing pattern.
- Carefully remove old laces, noting the path.
- Thread new laces, maintaining a consistent pattern.
- Pull laces tight and even for a snug feel.
- Securely tie off the end of the lace.
Conclusion
You’ve now learned how to relace your baseball glove, transforming it into a perfectly fitted tool for the field. Remember, taking your time with each step ensures a secure and comfortable glove. This skill not only improves your game by giving you better control but also saves you money on professional services. Don’t hesitate to practice the weave; the more you do it, the better you’ll get.
Your next step is simple: grab those new laces, lay out your tools, and give your glove the custom fit it deserves. You’re ready to enhance your play!
Frequently Asked Questions
How often should I relace my baseball glove?
You should consider relacing your glove when the current laces start to show significant wear, like cracking or fraying. If your glove feels loose or the pocket isn’t as deep as it used to be, it’s probably time for fresh laces. Many players relace their gloves at least once a season, depending on usage.
Can I use any type of lace for my baseball glove?
While you can technically use various laces, it’s best to stick with **quality leather laces** specifically designed for baseball gloves. These offer the best durability and flexibility. Synthetic laces can work but may not offer the same feel or longevity as traditional leather.
How do I make sure my glove isn’t too tight after relacing?
As you tighten the laces, flex the glove repeatedly to distribute the tension evenly. You want a snug fit that allows the glove to close naturally, not one that feels stiff or restricts your hand movement. If it feels too tight, loosen it slightly and flex again.
What’s the best way to finish the lace when I’m done?
The most reliable way to finish is by tying a **secure knot**, like a double knot or a surgeon’s knot, at the end of the lace. Trim any excess lace, but leave enough so you can untie it later if needed. Tucking the knot neatly can prevent it from snagging during play.
My glove feels really stiff after relacing. What can I do?
A stiff feeling is common after relacing. You’ll need to work the glove to break it in again. Flex it open and closed repeatedly, and consider using a small amount of glove oil or conditioner on the leather. Playing catch and practicing fielding ground balls will also help soften it up.